Basic System Tools
Lesson 0
Part 3. Configuring VS Code
Welcome Screen
Now that VS Code has been successfully installed, let's open this text editor and configure it for use. When you launch VS Code for the first time, you should get a welcome screen that looks something like the screen below. Your screens may not look exactly like this, but they should be close enough to allow you to configure this application correctly. Also, you can click on any screen below to Zoom In and this will let you get a better look at each one.
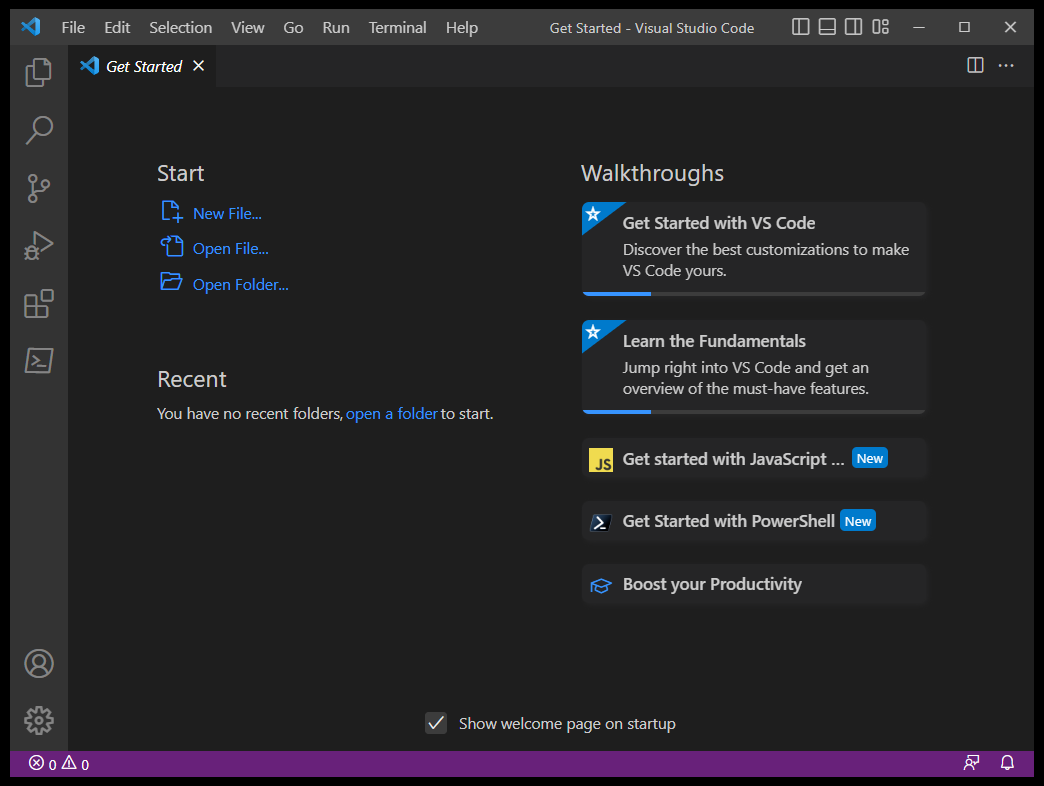
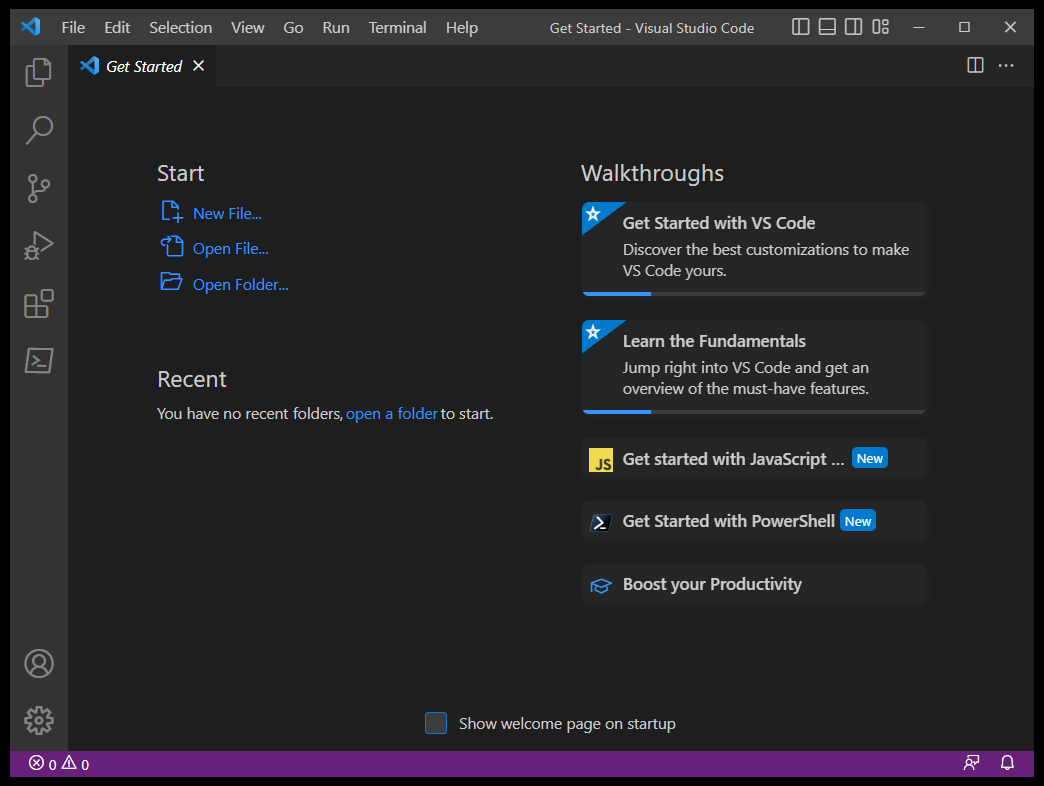
We've never found this welcome screen to offer anything special, so we recommend unchecking the checkbox at the bottom of the welcome screen so that you never have to see it again.
Enabling Auto Save
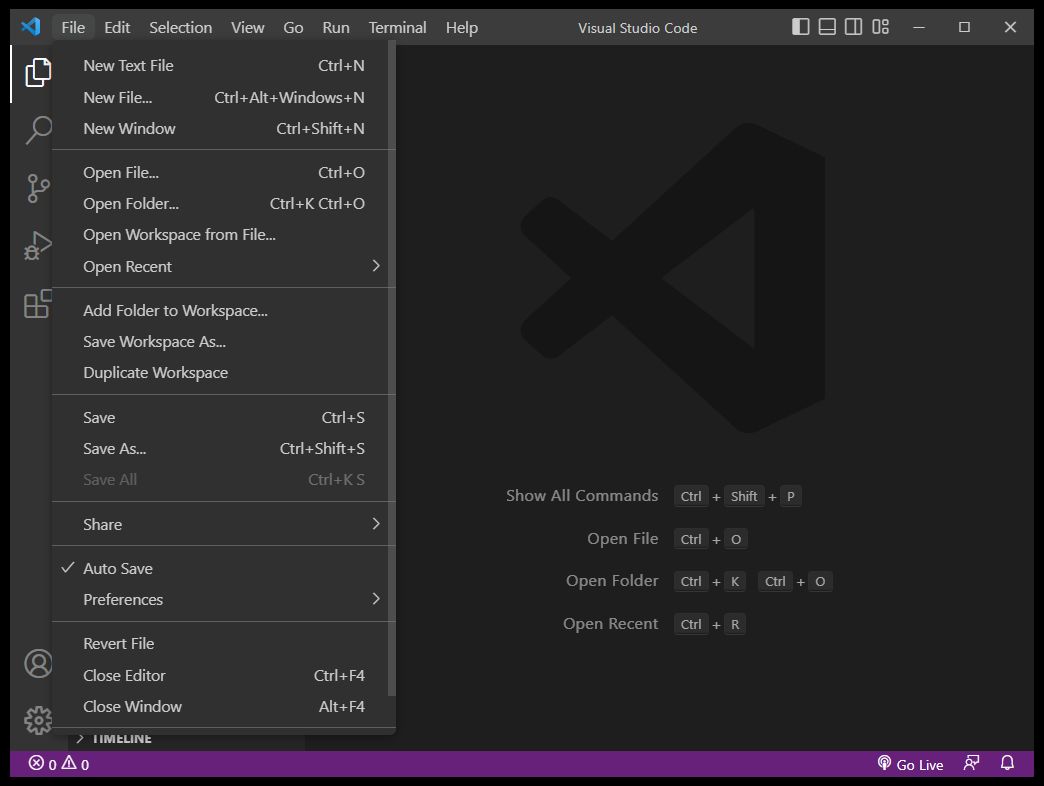
One of the best ways to make sure that your code gets updated and saved regularly is to enable Auto Save. This is actually very easy to accomplish. Simply click on the File item on the menu bar at the top of the screen, and then click on the words Auto Save about three-quarters of the way down the menu. A checkmark will appear next to those words. And now you are done.
Enabling Word Wrap
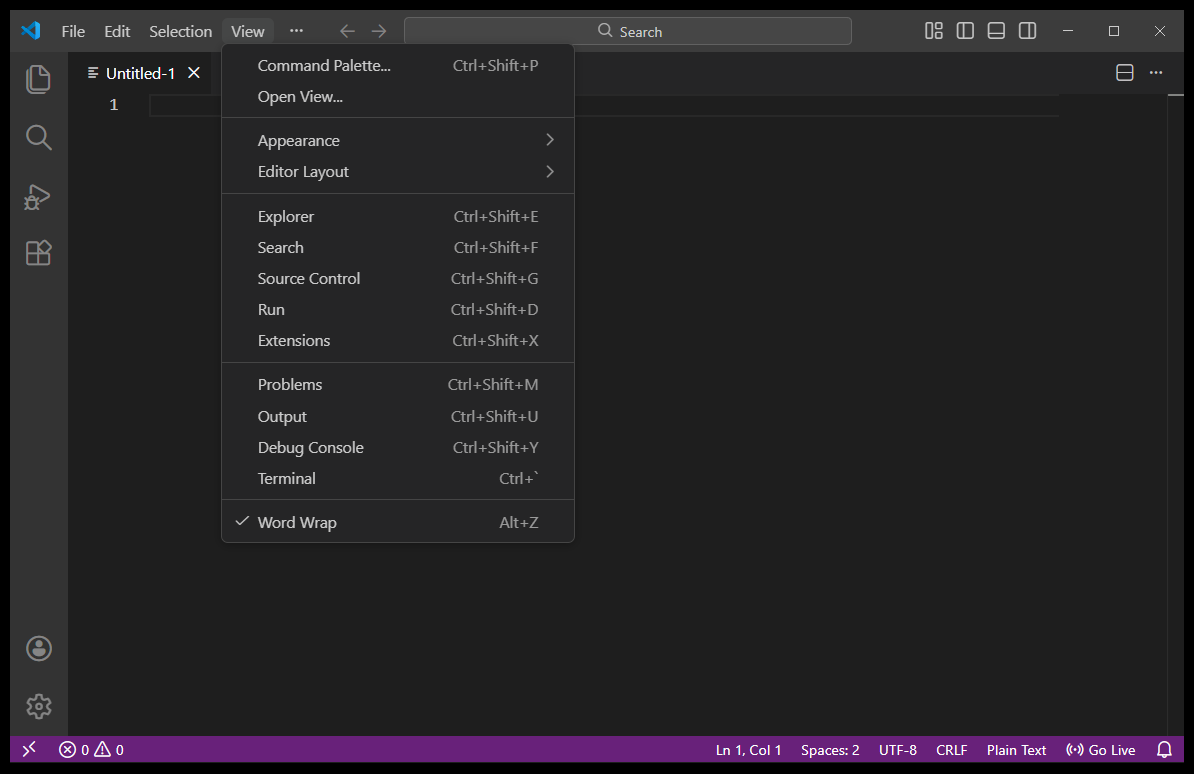
Another useful feature is Word Wrap. Click on the View item on the menu bar at the top of the screen, and then click on the words Word Wrap at the bottom of that menu. A checkmark will appear next to those words when Word Wrap is enabled. And if the words "Word Wrap" is grayed-out, then you will probably need to open a file (like a text file) first to make the setting and checkmark available.
Selecting the Dark+ Color Theme
Selecting a Color Theme that is easy on your eyes is always a good thing, especially if you are going to spend hours of your life looking at your computer screen. Most people prefer dark color themes that employ text colors that are not too bright or distracting. In these tutorials, we will be using the Dark+ color theme, so if you want your code screens to resemble ours more closely, then that is the color theme that we recommend for you to use, at least for now.
In reality, the number of dark color themes has recently changed, so much so that Dark+ is no longer the default color theme for VS Code. And you will find subtle differences between the color themes of Dark+, Dark Modern, and Dark (Visual Studio). However, the new Default Dark color scheme for VS Code is now Dark 2026, which we find a little bit too colorful and distracting. And of course, there is an entire range of light color themes as well as dark color themes. Some of these themes are far too colorful for doing serious coding in our opinion. But they also offer a couple of high contrast themes for people who are visually-impaired. And you fit into that category, you might want to try out the Dark High Contrast theme. But as stated earlier, we have used the Dark+ color theme here in all of our examples, and we feel that you will do better if you use that theme, or one of its close cousins. Enough said on VS Code color themes.
To select a color theme, first click on the click on the File item on the menu bar at the top of the screen, and then click on Preferences about three-quarters of the way down the menu (it is right below Auto Save which we configured earlier). Another menu will appear to the right of those words. Now click on the Themes item on that menu, and another menu list will appear. From that list, you will select Color Theme, and when you click on that item, a list of all possible color themes will appear.
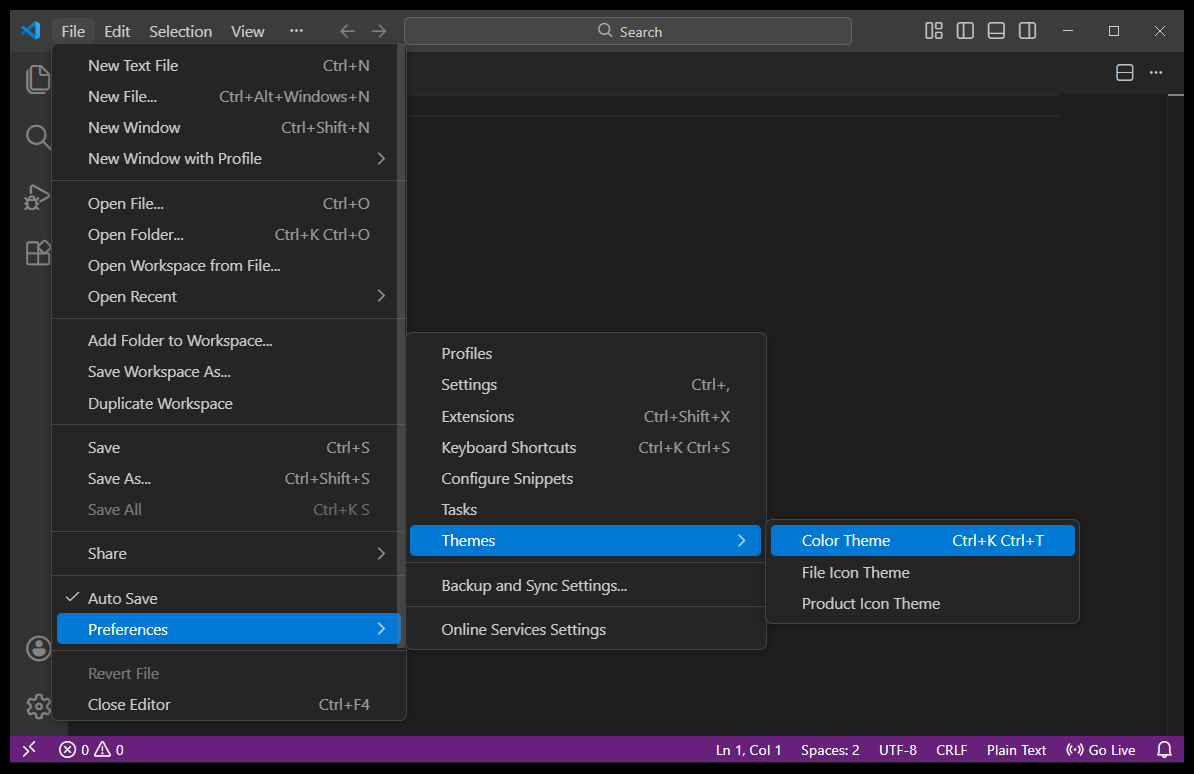
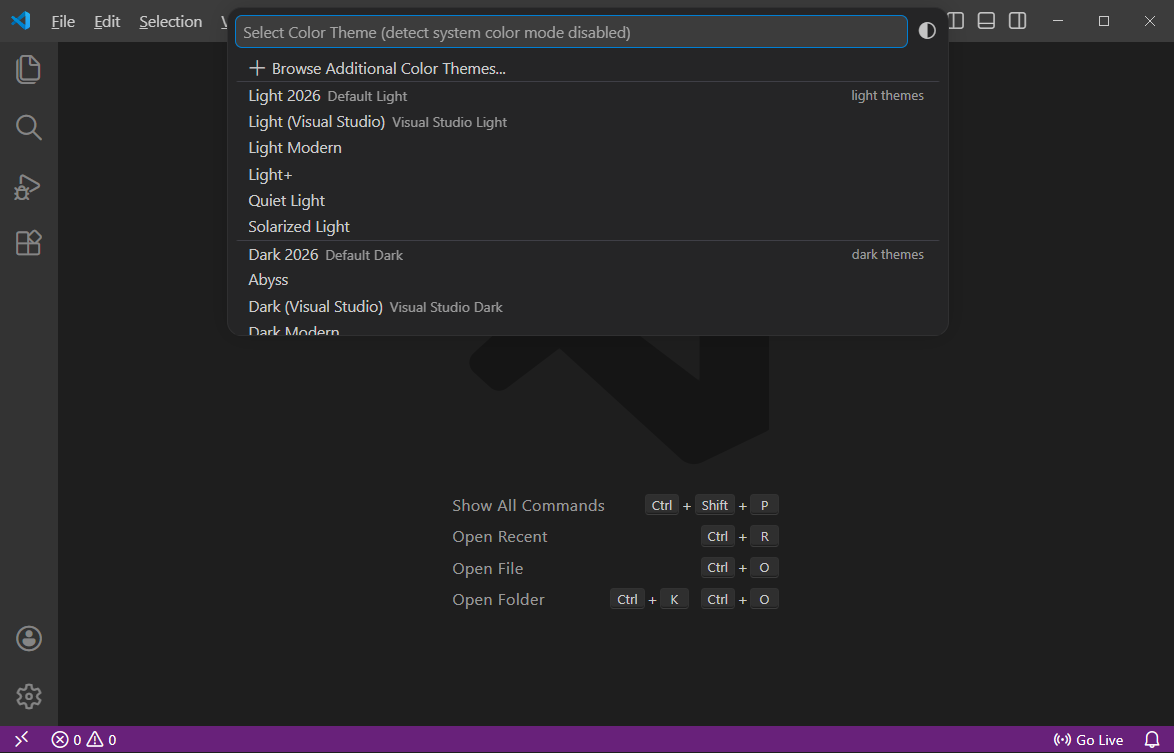
On this list, you will see an area of light themes, an area of dark themes, and maybe even an area of high contrast themes. Once again, we believe that the Dark+ (Default Dark+) theme is the easiest one on the eyes. Click on that theme and you are done configuring your color theme.
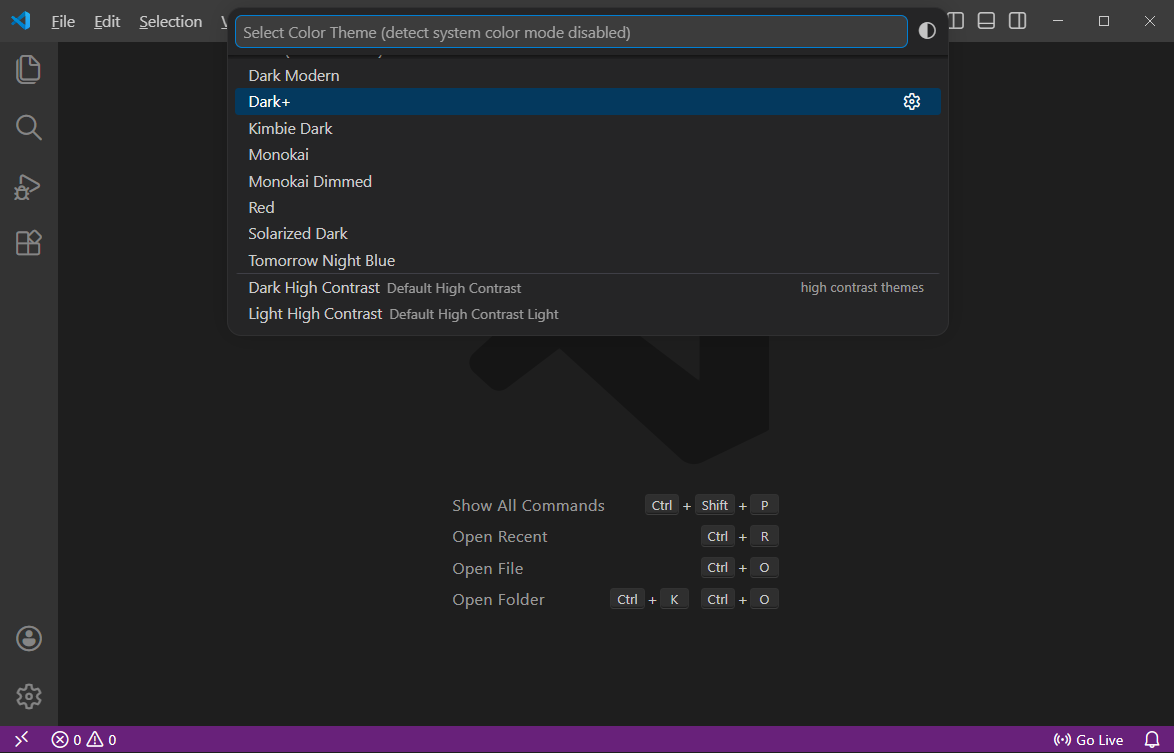
In the two screens below, you will see a listing of all of the possible color themes. Some are light themes, some are dark themes, and there are even two high contrast themes listed at the bottom. They are listed in a somewhat alphabetical order. We are showing you all of these in two screens to illustrate that the Dark + color theme might be farther down in the listing, and you might have to scroll down to find it.
You will find the Dark + color theme about halfway down.
Installing Extensions to VS Code
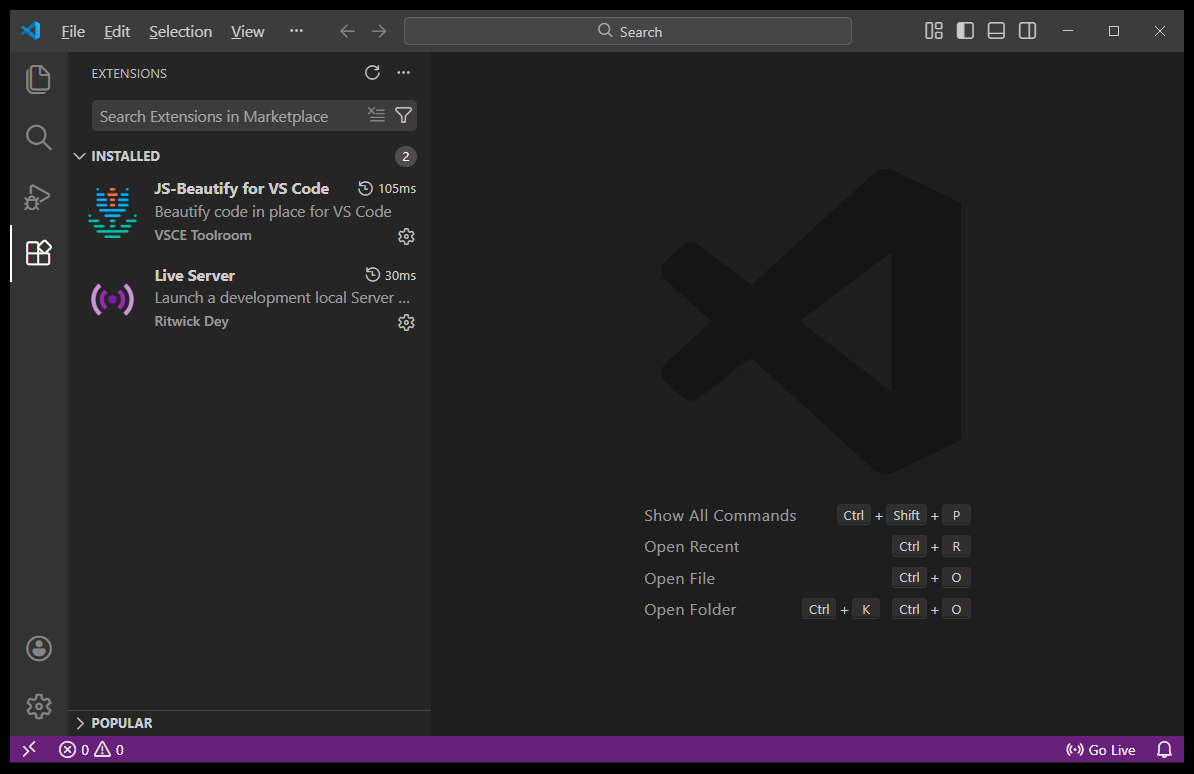
There are lots of extensions you can install on VS Code, and that is one of the main reasons why VS Code is such a popular and powerful code editor. However we are going to install only two essential extensions right now. One of these extensions is the Live Server extension by Ritwick Dey. Live Server allows us to open our code in a tab on our default web browser to preview how our code will look as we type it. What could be more useful than that? The other extension we will install is the JS-Beautify for VS Code extension by VSCE Toolroom. JS-Beautify helps us to autoformat our code so that it looks better and is much better organized. The illustration below shows us a listing of these two extensions after they are installed.
We will install the JS-Beautify extension first. There a lot of autoformatters out there. In fact, the one called Prettier is undoubtedly the more popular autoformatter. And the one called Beautify was always our favorite, but it was deprecated by Microsoft because they felt that was no longer being properly maintained. We'll talk more about autoformatters later.
To install the JS-Beautify extension, first click on the
 icon in the column on the left side of the
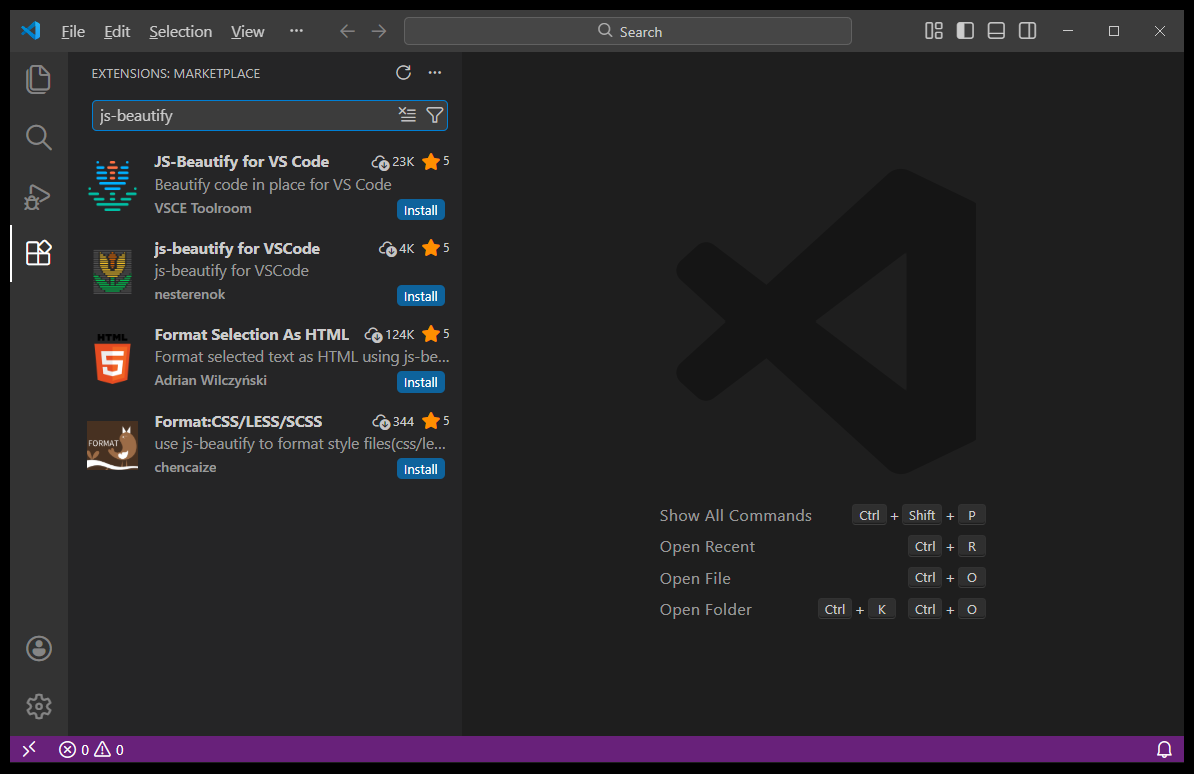
screen. Then type the term js-beautify in the Search Extensions in Marketplace search bar at the top of
the Extensions menu. And then, every extension that includes that term in it will appear below. There will be about four
of them. But the one you want to install is called the JS-Beautify for VS Code extension by VSCE Toolroom, and
it is most likely listed at the top.
icon in the column on the left side of the
screen. Then type the term js-beautify in the Search Extensions in Marketplace search bar at the top of
the Extensions menu. And then, every extension that includes that term in it will appear below. There will be about four
of them. But the one you want to install is called the JS-Beautify for VS Code extension by VSCE Toolroom, and
it is most likely listed at the top.
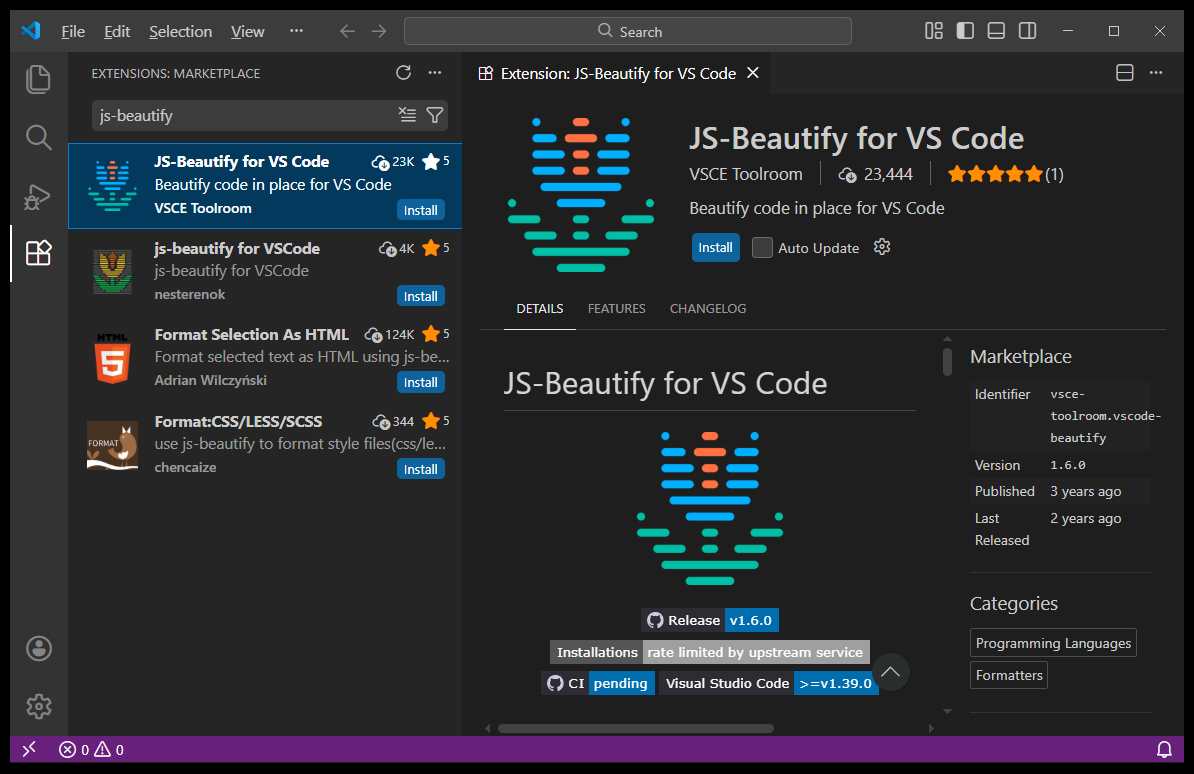
If you click on that extension, more information on it will appear about the right. A blue Install button will appear on the bottom right of that now highlighted extension, and there will be another blue Install button on the right. Click on either button and the extension will be automatically installed.
Next, we will install the Live Server extension. For this extension, the process is similar. Click on
the icon in the column on the left side
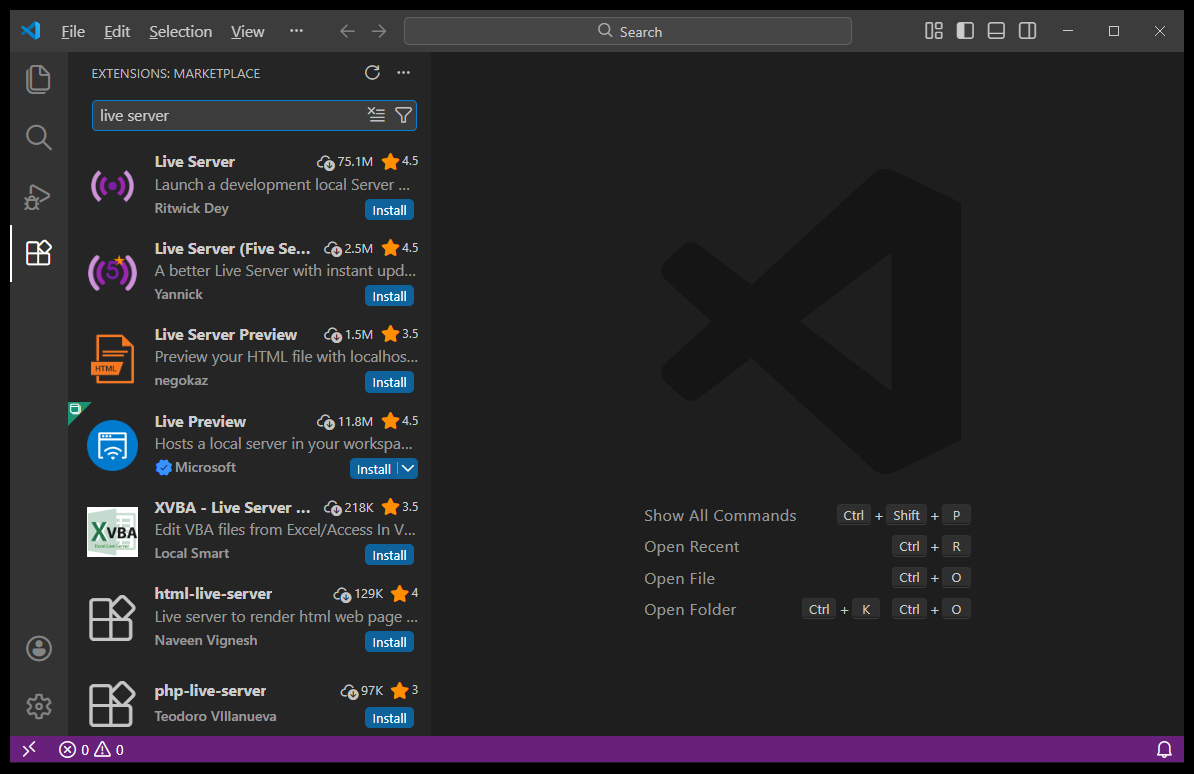
of the screen. Then type live server in the Search Extensions in Marketplace search bar at the top
of the Extensions menu. Then, every extension that includes one of those words will appear below, and there will be
several. But most likely, the one you want to install will probably be at the top. It is appropriately called the
Live Server extension by Ritwick Dey.
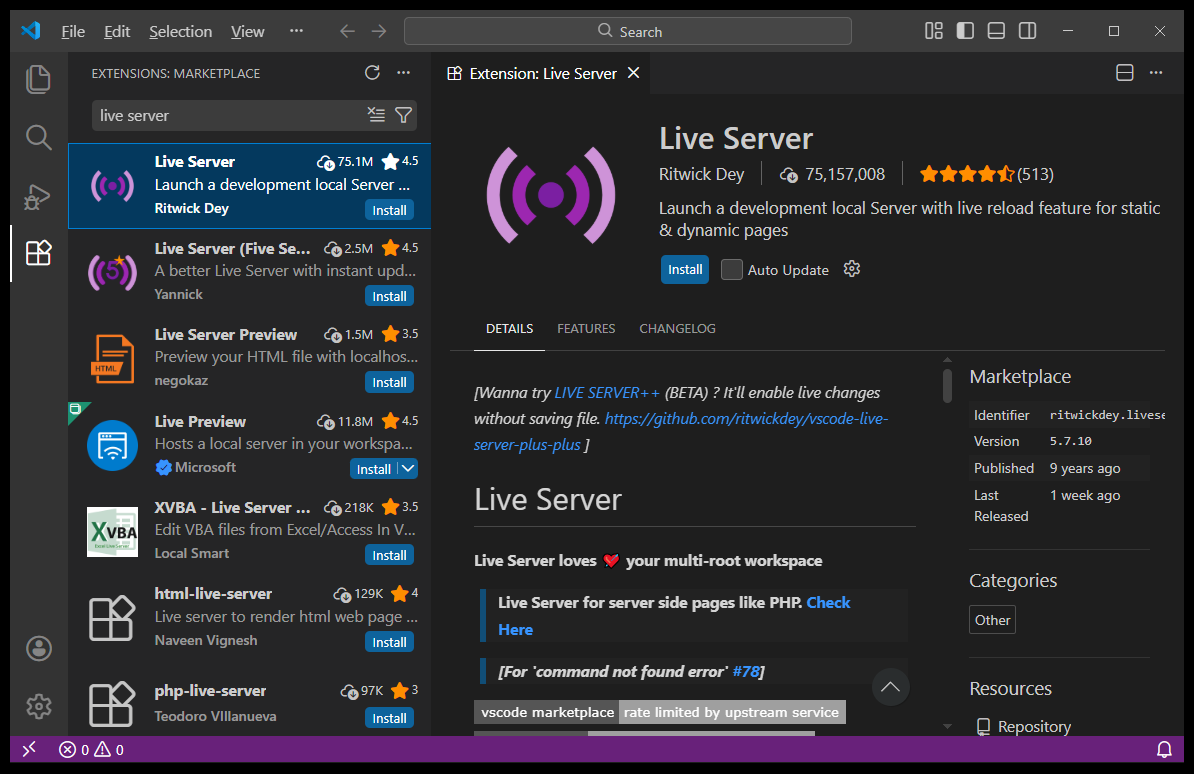
If you click on that extension, more information on it will appear about the right. A blue Install button will appear on the bottom right of that now highlighted extension, and there will be another blue Install button on the right. Click on either button and the extension will be automatically installed.
Now both the JS-Beautify and the Live Server extensions are installed. Your extensions menu should resemble the illustration below. And VS Code is completely configured and ready to use.
Other Autoformatters
We believe that you made the best possible choice by installing JS-Beautify. And if you are also happy with that decision, you can move on to The Next Part, and ignore the rest of this discussion. For all others who are more curious, please follow along.


Beautify was one of the first autoformatters, and it still works quite well, except in two cases. You cannot successfully use Beautify to autoformat JavaScript code that includes nullish coalescing operators and/or optional chaining operators. Both of these JavaScript operators were introduced in 2020. And for that reason, Microsoft deprecated Beautify. But savvy programmers who preferred it to other autoformatters made a fork of the Beautify code, and added in code fixes for the above-mentioned operators, before releasing this newer extension as JS-Beautify for VS Code. And that is why we recommend installing it instead of Beautify. In future lessons, if we use the word Beautify, we will be telling you to autoformat your code using the extension named JS-Beautify for VS Code.
And it would be remiss if we failed to mention Prettier, which is the more popular autoformatting extension in use today. There are several reasons why we do not recommend it as the best choice for beginners. Its biggest issue has to do with Auto Save, because it requires special settings in VS Code to make it work with Auto Save. And that increases the likelihood that your code will not be saved when you close VS Code, which creates frustration that we'd like to avoid. Another problem with Prettier is that it likes to add trailing slashes to all void elements in your code. That really doesn't hurt anything, and your code still works. But HTML5 removed this requirement, even though XML and XHTML still requires trailing slashes. This decision was made by the developers of Prettier so that they could support more languages with their extension. But your code will not look like our code examples if you use Prettier instead of JS-Beautify. When your skills become more advanced, please feel free to explore the practice of using Prettier as your default autoformatter. But for now, please take our advice and the easier path by using only JS-Beautify as your default autoformatter. You'll be glad you did.